Android AsyncTask (Asynchronous Task) is an abstract class provided by Android. Here we go to see, how to use Asynctask in android. Asynctask gives us the liberty to perform heavy tasks in the background and keep the UI thread light thus making the application more responsive and fast.
AsyncTask class is used to do background operations that will update the UI(user interface). Mainly we used it for short operations that will not affect our main thread.
The android application runs on a single thread when launched. Due to this single thread model tasks that take a long time to fetch the response can make the application non-responsive.
To avoid this we use android AsyncTask to perform the heavy tasks in the background on a dedicated thread and passing the results back to the UI thread. Hence use of AsyncTask in the android application keeps the UI thread responsive at all times.
Sometimes, we use for getting data from the server using Asynctask in android
Asynchronous execution
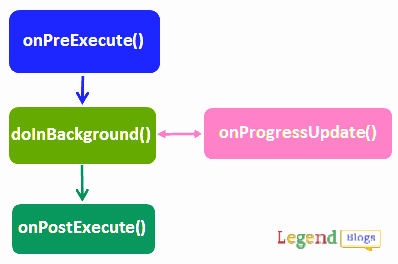
When an asynchronous task is executed, the task goes through 4 steps.
AsyncTask class is firstly executed using execute() method. In the first step AsyncTask is called onPreExecute() then onPreExecute() calls doInBackground() for background processes and then doInBackground() calls onPostExecute() method to update the UI.
1. onPreExecute():
This method contains the code which is executed before the background processing starts. This invoked on the UI thread before the task is executed. This step is normally used to set up the task, for instance by showing a progress bar in the user interface.
2. doInBackground (Params...):
This method contains the code which needs to be executed in the background. In this method, we can send results multiple times to the UI thread by publishProgress() method.
To notify you that the background processing has been completed we just need to use the return statements. This invoked on the background thread immediately after onPreExecute() finishes executing.
This step is used to perform background computation that can take a long time. The parameters of the asynchronous task are passed to this step.
3. onProgressUpdate (Progress...):
This method receives progress updates from doInBackground method and runs on the UI thread, which is published via publishProgress method, and this method can use this progress update to update the UI thread.
This method is used to display any form of progress in the user interface while the background computation is still executing. You can use Progress Bar or show Toast for users.
4. onPostExecute (Result):
This method is called after doInBackground method computation finishes on the UI thread. The result of the background computation is passed to this step as a parameter. You can use the progress bar or show Toast for users.
Example Code syntax for Android AsyncTask:
private class MyAsyncTask extends AsyncTask<URL, Integer, Long> {
protected void onPreExecute() {
// update the UI before background processes start
}
protected Long doInBackground(URL... urls) {
// code that will run in the background
return ;
}
protected void onProgressUpdate(Integer... progress) {
// receive progress updates from doInBackground
}
protected void onPostExecute(Long result) {
// update the UI after background processes completes
}
}
In the above snippet, we’ve used a sample class name that extends Asynctask in the android, and the execute method is used to start the background thread.
- The AsyncTask instance must be created and invoked in the UI thread.
- The methods overridden in the AsyncTask class should never be called. They’re called automatically
- AsyncTask can be called only once. Executing it again will throw an exception.
- You can change the return parameter type as well as request parameter type according to your requirement.
Asynctask example in android
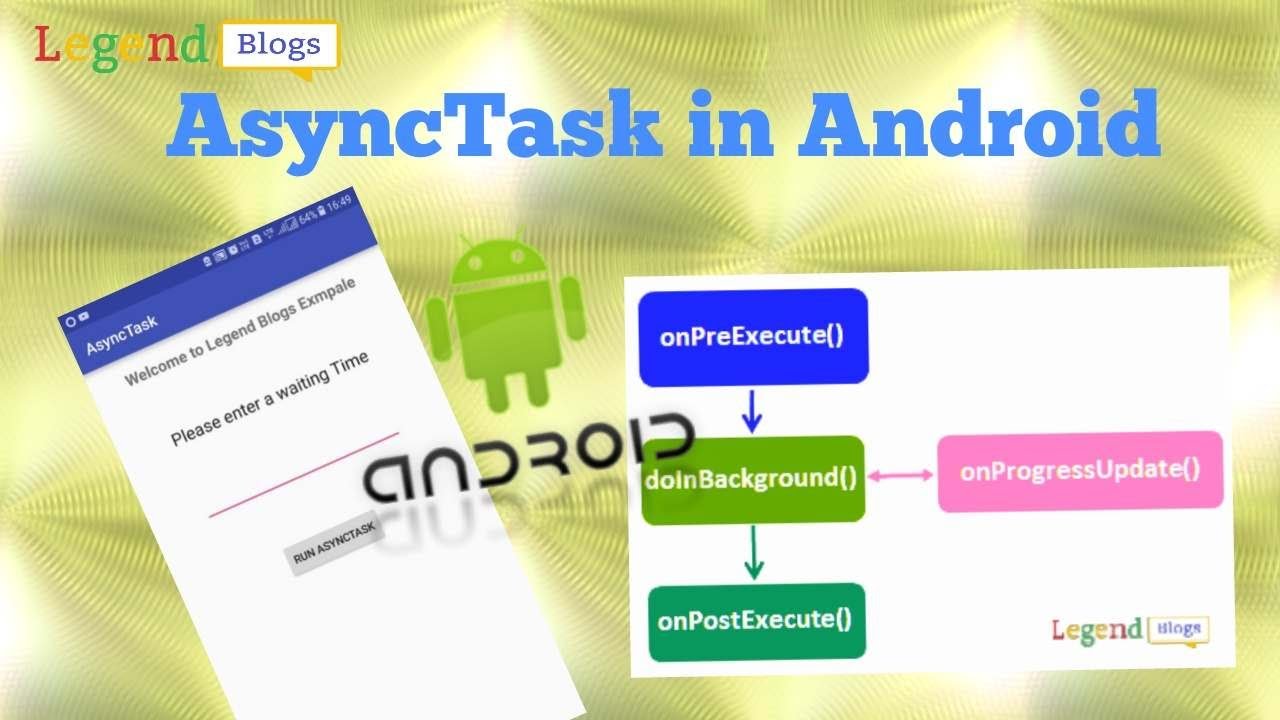
Now let's take an example of AsyncTask that makes a process to go to sleep for a given period of time as set by the user.
The xml layout is defined in the activity_main.xml and its given below:
AndroidManifest.xml
<?xml version="1.0" encoding="utf-8"?>
<manifest xmlns:android="http://schemas.android.com/apk/res/android"
    package="com.legendblogs.asynctask">
    <application
        android:allowBackup="true"
        android:icon="@mipmap/ic_launcher"
        android:label="@string/app_name"
        android:supportsRtl="true"
        android:theme="@style/AppTheme">
        <activity android:name=".MainActivity">
            <intent-filter>
                <action android:name="android.intent.action.MAIN" />
                <category android:name="android.intent.category.LAUNCHER" />
            </intent-filter>
        </activity>
    </application>
</manifest>
activity_main.xml
<?xml version="1.0" encoding="utf-8"?>
<RelativeLayout xmlns:android="http://schemas.android.com/apk/res/android"
    xmlns:tools="http://schemas.android.com/tools"
    android:layout_width="match_parent"
    android:layout_height="match_parent"
    android:paddingBottom="@dimen/activity_vertical_margin"
    android:paddingLeft="@dimen/activity_horizontal_margin"
    android:paddingRight="@dimen/activity_horizontal_margin"
    android:paddingTop="@dimen/activity_vertical_margin"
    tools:context="com.legendblogs.asynctask.MainActivity">
    <TextView
        android:layout_width="wrap_content"
        android:layout_height="wrap_content"
        android:text="Welcome to Legend Blogs Exmpale"
        android:layout_alignParentTop="true"
        android:layout_centerHorizontal="true"
        android:textStyle="bold"
        android:textSize="20dp"
        android:id="@+id/textView2" />
    <TextView
        android:layout_width="wrap_content"
        android:layout_height="wrap_content"
        android:textAppearance="?android:attr/textAppearanceLarge"
        android:text="Please enter a waiting Time"
        android:id="@+id/textView"
        android:layout_below="@+id/textView2"
        android:layout_centerHorizontal="true"
        android:layout_marginTop="64dp" />
    <EditText
        android:layout_width="wrap_content"
        android:layout_height="wrap_content"
        android:id="@+id/editText"
        android:layout_below="@+id/textView"
        android:layout_marginTop="56dp"
        android:layout_alignEnd="@+id/textView"
        android:layout_alignStart="@+id/textView" />
    <Button
        android:layout_width="wrap_content"
        android:layout_height="wrap_content"
        android:text="Run AsyncTask"
        android:id="@+id/button"
        android:layout_below="@+id/editText"
        android:layout_centerHorizontal="true"
        android:layout_marginTop="62dp" />
</RelativeLayout>
MainActivity.java
package com.legendblogs.asynctask;
import android.content.Context;
import android.support.v7.app.AppCompatActivity;
import android.os.Bundle;
import android.view.View;
import android.widget.Button;
import android.widget.EditText;
public class MainActivity extends AppCompatActivity {
    Context context;
    EditText editText;
    Button button;
    @Override
    protected void onCreate(Bundle savedInstanceState) {
        super.onCreate(savedInstanceState);
        setContentView(R.layout.activity_main);
        this.context = this;
        editText = (EditText) findViewById(R.id.editText);
        button = (Button) findViewById(R.id.button);
        button.setOnClickListener(new View.OnClickListener() {
            @Override
            public void onClick(View v) {
                if(editText != null && editText.length() > 0)
                new MyAsyncTask(context).execute(editText.getText().toString());
            }
        });
    }
}
MyAsyncTask.java
package com.legendblogs.asynctask;
import android.app.ProgressDialog;
import android.content.Context;
import android.os.AsyncTask;
import android.util.Log;
/**
 * Created by androidexec on 15-05-2018.
 */
public class MyAsyncTask  extends AsyncTask<String, String, String> {
    Context context;
    String result;
    ProgressDialog progressDialog;
    public MyAsyncTask (Context context) {
        this.context = context;
    }
    @Override
    protected void onPreExecute() {
        super.onPreExecute();
        progressDialog = ProgressDialog.show(context,
                "Progress Dialog", null);
    }
    @Override
    protected String doInBackground(String... args) {
        int value = Integer.parseInt(args[0]);
        for(int i = 0; i <= value ;i++){
            try {
                Thread.sleep(1000);
            } catch (Exception e) {
                Log.v("Error: ", e.toString());
            }
            result = "Please wait for " + (value - i ) + " seconds";
            publishProgress(result);
        }
        return null;
    }
    @Override
    protected void onProgressUpdate(String... text) {
        progressDialog.setMessage(text[0]);
    }
    protected void onPostExecute(String result) {
        progressDialog.dismiss();
    }
}
In the above code, we’ve used AsyncTaskRunner class to perform the AsyncTask operations. The time in seconds is passed as a parameter to the class and a ProgressDialog is displayed for the given amount of time.
Advantages of Android AsyncTask
Android AsyncTask have many advantages for users to use this, Let's take a review on a few points:
- Lightweight Process
- Asynchronous execution
- Easy to implement for heavy task
- Custom Thread Management
- Simple and quick
Custom Thread Management
Using the AsyncTask is the easiest and most convenient way to manage background tasks from within an Activity.
However, in cases where tasks need to be processed in parallel with more control, or the tasks need to continue executing even when the activity leaves the screen, you'll need to create a background service or manage threaded operations more manually.
Limitations of Android AsyncTask
The modern AsyncTask is limited to 128 concurrent tasks, with an additional queue of 10 tasks (if supporting Android 1.5, it’s a limit of ten tasks at a time, with a maximum queue of 10 tasks).
That means that if you queue up more than 138 tasks before they can complete, your app will crash.
An AsyncTask is tightly bound to a particular Activity. In other words, if the Activity is destroyed or the configuration changes then the AsyncTask will not be able to update the UI on completion.
As a result, for short one-off background tasks tightly coupled to updating an Activity, we should consider using an AsyncTask as outlined above.
The image given below is the outputs produced by the project where the time set by the user is 5 seconds.
Read more :
Thank you and happy coding..


Write a comment